Booklist:


Wednesday – introduce topic
Today we are going to look at surface tension and buoyancy. What makes things float? This is in preparation for a field trip to the Calvert Marine Museum on Friday which has indoor and outdoor collections of historic boats. In addition, there is a boat shed where the boat restorations and building of historic replicas take place -- you can visit the boat shed and speak to the woodworkers.
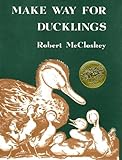
Begin by reading Make Way for Ducklings
Science Experiment 1:
Do the “Make a Paperclip Float” activity. Have the children use paper to record the results of their experiments.
Read Time of Wonder
Science Experiment 2:
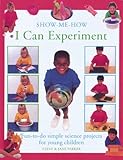
Do the “Sink or Swim” activity on pages 34-35 of I Can Experiment. Ask the children to make predictions before testing each object, then record their findings on a sheet:
“Sink”
“Float”
Discuss the explanation “Floating Forces” on page 34 of I Can Experiment.
Additional Surface Tension Experiments
Thursday – explore topic
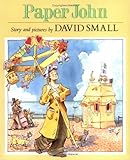
Read Paper John
Activity: “Folding a Paper Boat”
After a while, your paper boat will no longer float. Why is that? Ask the children if they can come up with some theories (using what they learned in previous experiments) as to what makes the boat sink.
When you visit the Calvert Marine Museum, it will be either high or low tide when you first get there. Explain to the children that the tides will change and that you can visit the Marsh Walk twice (once before the Tennison cruise, once after). By visiting twice, you will see different things. At high tide, water covers most of the mud flats at the marsh and you see ducks, crabs, or jellyfish swimming. At low tide, the water is much shallower and mud is exposed. In this mud you can see evidence of fiddler crab burrows and even the giant claw of a fiddler crab or two. Great blue herons, raccoons, and river otters also visit the marsh to hunt for their dinner and you may see evidence of their footprints in the mud.
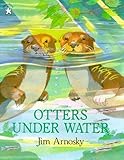
Read Otters under Water
Regardless of what time of day you do the marsh walk, you’ll want to have your underwater viewfinders with you. This will help you get a close-up view of the animals’ underwater world.
Activity: Have each child make an “Underwater Scope” to take on the field trip. If you end up with extra time, the children can put some of the objects used in their experiments in a bowl of water and practice using their scopes to magnify them.
Friday – make field trip journals
While waiting for the field trip, read The Lighthouse Cat
Ask the children to use construction paper and crayons to draw a lighthouse of their own design (the cover of their field trip journals). Have each child write his/her name on the back of the artwork. Fold and hole punch 8 ½ x 11 white paper, punch artwork to match. Tie ribbons through holes. Have each child write the name of the field trip destination, the date, and his/her age on Page 1 of the journal. Have each child write a prediction of what he/she expects to see and do on the field trip on Page 2. Take the journals and a pencil for each child so that he/she can take notes on the field trip.

Materials List
Lined paper for each child to record results of science experiments
Pencils
Clean dry paperclips
Tissue paper
A bowl of water
Pencil with eraser
Baby powder
Dish detergent
Cardstock
Bamboo skewers
Plastic cups
Tape
Household items such a cork, pumice stone, pebble, small sieve, metal dish, clothespin, dry sponge, wooden spoon, metal spoon, nail, ping pong ball, etc.
Several rolls of pennies
Quarter
3 or 4 medicine droppers
Several dinner glasses
Water
8 ½ x 11 white paper
Empty plastic containers with lids (such as yogurt containers) – 1 for each child
Scissors
Plastic wrap
Construction paper
Crayons
3 hole punch
8 ½ x 11 inch white paper
Ribbon in various colors
Pencils


 Immersive Experience
 Immersive Experience
 Immersive Experience
No comments:
Post a Comment